Chapter 5: The `<body>` Element – Building the Visible Webpage
Learn everything about the HTML <body> element, how browsers render visible content, document flow, best practices, and real-world examples.
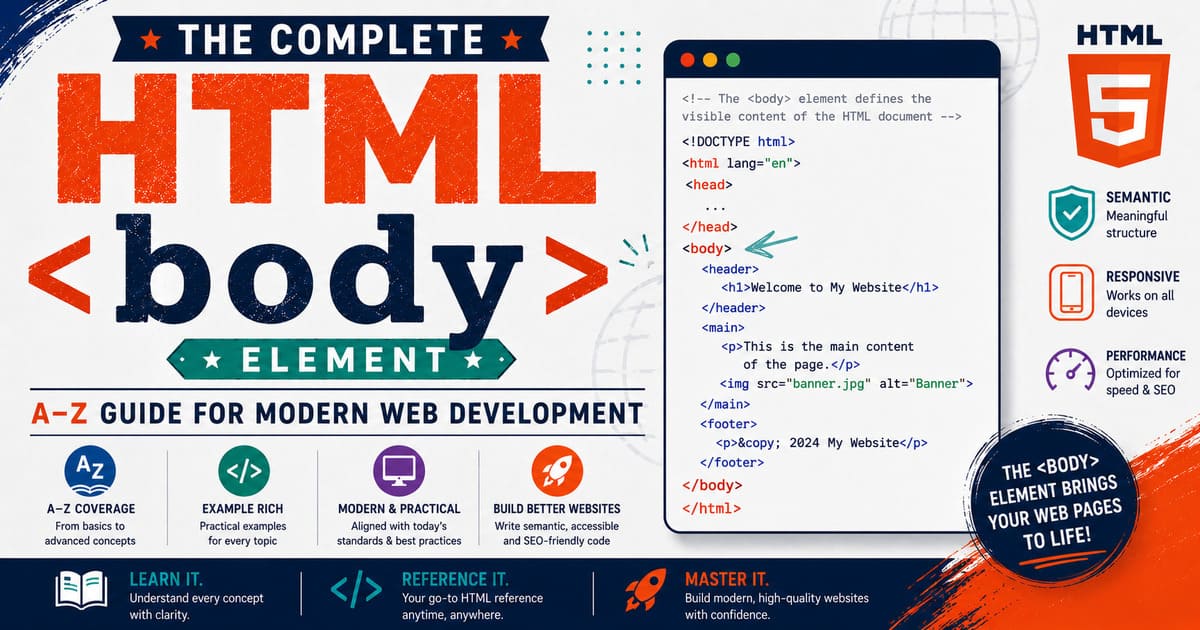
Chapter 5: The <body> Element – Building the Visible Webpage
Introduction
In the previous chapters, you explored the invisible part of an HTML document—the <head> element. It contains metadata, stylesheets, scripts, page titles, and other information that helps browsers understand the webpage.
Now we arrive at the most recognizable part of every HTML document:
1
<body>
Everything a visitor normally sees and interacts with belongs inside the <body> element.
Text, images, buttons, videos, forms, tables, menus, articles, and interactive components all live here.
Without the <body>, an HTML document may still be technically valid in some situations, but there is nothing meaningful for users to see or interact with.
Learning Objectives
After completing this chapter, you will understand:
- What the
<body>element is. - Why it is required in an HTML document.
- How browsers interpret the
<body>. - What types of content belong inside it.
- The relationship between
<html>,<head>, and<body>. - Browser rendering fundamentals.
- Best practices for structuring visible content.
- Common mistakes made by beginners.
What Is the <body> Element?
The <body> element represents the entire visible content of an HTML document.
Everything displayed inside the browser window is typically contained within this element.
Basic example:
1
2
3
4
5
6
7
8
9
10
11
12
13
14
15
16
17
<!DOCTYPE html>

<html lang="en">

<head>
    <title>My First Page</title>
</head>

<body>

    <h1>Welcome</h1>

    <p>This is my first webpage.</p>

</body>

</html>
The browser displays:
1
2
3
Welcome

This is my first webpage.
Notice that the <title> element is not displayed inside the page. It appears in the browser tab because it belongs to the <head>.
Why Is It Called “Body”?
Think about the structure of the human body.
A human has:
- A head
- A body
The head contains essential control information such as the brain, eyes, ears, and other organs.
The body contains the parts that perform most visible and physical activities.
HTML follows a similar idea:
1
2
3
4
5
6
7
HTML Document
│
├── Head
│     Invisible information
│
└── Body
      Visible webpage
This naming makes the document easier to understand and organize.
Where Must the <body> Element Appear?
The <body> element comes after the <head> element.
Correct structure:
1
2
3
4
5
6
7
8
9
10
11
12
13
14
15
16
17
<!DOCTYPE html>

<html lang="en">

<head>

    <title>Example</title>

</head>

<body>

    <h1>Hello</h1>

</body>

</html>
Incorrect structure:
1
2
3
4
5
6
7
8
9
<body>

<head>

<title>Example</title>

</head>

</body>
The browser may attempt to recover from this error, but the document no longer follows the HTML specification.
Is the <body> Element Required?
Yes.
Every complete HTML document should contain one <body> element.
Modern browsers can automatically insert a missing <body> when parsing malformed HTML, but developers should never rely on that behavior.
Always write it explicitly.
How Many <body> Elements Can a Document Have?
An HTML document must contain only one <body> element.
Correct:
1
2
3
4
5
<body>

<h1>Hello</h1>

</body>
Incorrect:
1
2
3
4
5
6
7
8
9
10
11
<body>

<h1>Page One</h1>

</body>

<body>

<h1>Page Two</h1>

</body>
Browsers generally ignore additional <body> elements or merge content in unpredictable ways.
What Can Be Placed Inside <body>?
Almost every visible HTML element belongs inside the <body>.
Examples include:
- Headings
- Paragraphs
- Images
- Hyperlinks
- Tables
- Lists
- Forms
- Audio
- Video
- Buttons
- Navigation menus
- Articles
- Sections
- Figures
- Blockquotes
- Code samples
- Dialogs
- Interactive widgets
The <body> is essentially the container for everything users experience on the page.
The Browser’s Perspective
When the browser reads an HTML document, it processes it in a specific order.
Conceptually:
1
2
3
4
5
6
7
8
9
10
11
12
13
14
15
16
17
18
19
20
21
22
23
24
25
26
27
28
29
Read HTML
      │
      ▼

Read <head>
      │
      ▼

Load metadata
      │
      ▼

Read <body>
      │
      ▼

Create DOM Nodes
      │
      ▼

Apply CSS
      │
      ▼

Execute JavaScript
      │
      ▼

Render Visible Page
The <body> provides the structural content that becomes part of the Document Object Model (DOM).
The Document Object Model (DOM)
Every element inside the <body> becomes a node in the DOM.
Consider this HTML:
1
2
3
4
5
6
7
<body>

<h1>HTML Tutorial</h1>

<p>Learning HTML is fun.</p>

</body>
The browser builds a simplified tree like this:
1
2
3
4
5
6
7
8
9
Document
│
└── body
      │
      ├── h1
      │     └── "HTML Tutorial"
      │
      └── p
            └── "Learning HTML is fun."
JavaScript can later access, modify, or remove these nodes.
What Users Actually See
Suppose your HTML is:
1
2
3
4
5
6
7
8
9
<body>

<h1>Welcome</h1>

<p>This is my website.</p>

<img src="photo.jpg" alt="Sample">

</body>
The visitor sees:
- A heading
- A paragraph
- An image
The browser hides all structural tags and displays only the rendered result.
The <body> Is More Than Text
The <body> is not limited to text.
It can contain:
- Interactive forms
- Animations
- Videos
- Maps
- Charts
- Games
- Web applications
- Dashboards
- E-commerce stores
- Online editors
Modern websites are essentially complex applications built almost entirely inside the <body>.
Relationship Between <html>, <head>, and <body>
Think of the document hierarchy:
1
2
3
4
5
6
7
<html>
│
├── <head>
│      Metadata
│
└── <body>
       Visible Content
Or, using a building analogy:
1
2
3
4
5
6
7
Building
│
├── Blueprint Office
│      (<head>)
│
└── Living Space
       (<body>)
The blueprint defines the building.
The living space is where people actually spend their time.
Common Beginner Mistakes
Placing Metadata Inside <body>
Incorrect:
1
2
3
4
5
<body>

<title>My Website</title>

</body>
The <title> belongs inside the <head>.
Creating Multiple <body> Elements
Incorrect:
1
2
3
4
5
6
7
8
9
10
11
<body>

...

</body>

<body>

...

</body>
Use only one <body> element per document.
Writing Content Outside <body>
Incorrect:
1
2
3
4
5
6
7
<h1>Hello</h1>

<body>

<p>Example</p>

</body>
Visible content should be placed inside the <body>.
Best Practices
Professional developers should:
- Include exactly one
<body>element. - Keep the document well organized.
- Use semantic HTML elements inside the
<body>. - Separate structure (HTML), presentation (CSS), and behavior (JavaScript).
- Write clean, readable markup with consistent indentation.
Experiment
Create a new file named body-example.html.
Type the following:
1
2
3
4
5
6
7
8
9
10
11
12
13
14
15
16
17
18
19
<!DOCTYPE html>

<html lang="en">

<head>

<title>Body Example</title>

</head>

<body>

<h1>Welcome to HTML</h1>

<p>This content is displayed inside the browser window.</p>

</body>

</html>
Save the file.
Open it in your browser.
Observe:
- The browser tab displays Body Example.
- The webpage displays the heading and paragraph.
This simple experiment demonstrates the different roles of the <head> and <body>.
Did You Know?
Everything you see on popular websites—search boxes, videos, menus, shopping carts, dashboards, chat applications, and games—is ultimately rendered from HTML elements placed inside a single
<body>element.
Summary
In this section, you learned:
- What the
<body>element is. - Why it is required.
- Where it belongs in an HTML document.
- What types of content it can contain.
- How browsers interpret it.
- How it becomes part of the DOM.
- Common mistakes and professional best practices.
Coming Up Next
In the next section of Chapter 5, we’ll begin exploring the first visible HTML elements:
- What is a text node?
- How browsers display plain text.
- Whitespace handling.
- HTML comments.
- Character references (entities).
- The difference between content and markup.
These concepts form the foundation for understanding every visible HTML element that follows in The Complete HTML Reference: A–Z Guide for Modern Web Development.
Understanding Content Inside the <body>
When you open a webpage, you see text, images, buttons, menus, videos, and many other visual components.
However, the browser doesn’t think in terms of “pages.”
Instead, it thinks in terms of nodes.
Every piece of content inside the <body> becomes part of the Document Object Model (DOM).
Understanding these building blocks is essential before learning individual HTML elements.
Everything Inside HTML Is a Node
When a browser reads an HTML document, it converts it into a tree-like structure called the Document Object Model (DOM).
This tree consists of different kinds of nodes.
Common node types include:
- Document Node
- Element Node
- Text Node
- Comment Node
- Attribute Node (conceptually associated with elements)
- Document Type Node
As an HTML author, you’ll work mostly with Element Nodes and Text Nodes.
What Is an Element Node?
An Element Node represents an HTML element.
Example:
1
<h1>Welcome</h1>
The browser creates an element node for:
1
h1
This node stores information such as:
- Tag name
- Attributes
- Child nodes
- Parent node
Every HTML tag becomes an element node.
What Is a Text Node?
The text inside an HTML element is not another element.
It is stored as a Text Node.
Example:
1
<p>Hello World</p>
DOM representation:
1
2
p
└── "Hello World"
The quotation marks represent the text node.
Without text nodes, webpages would contain only empty elements.
Example DOM Structure
Consider the following HTML:
1
2
3
4
5
6
7
<body>

<h1>HTML Tutorial</h1>

<p>Learning HTML is fun.</p>

</body>
The browser creates something similar to:
1
2
3
4
5
6
7
8
9
10
11
12
13
Document
│
└── html
     │
     ├── head
     │
     └── body
          │
          ├── h1
          │     └── "HTML Tutorial"
          │
          └── p
                └── "Learning HTML is fun."
Every element and every piece of text has its own place in the DOM.
Elements vs Text
Many beginners confuse HTML tags with text.
Consider:
1
<h2>Programming</h2>
There are actually two different parts:
The element:
1
<h2> ... </h2>
The text:
1
Programming
The browser stores these separately.
The element provides structure.
The text provides content.
Empty Elements
Not every element contains text.
Example:
1
<hr>
The <hr> element creates a horizontal rule.
It contains:
- No text
- No child elements
Another example:
1
<br>
The <br> element creates a line break without containing any text.
These are known as void elements.
Parent and Child Relationships
HTML elements are organized hierarchically.
Example:
1
2
3
4
5
6
7
<section>

<h2>News</h2>

<p>Today's headlines...</p>

</section>
DOM:
1
2
3
4
5
6
7
section
│
├── h2
│     └── "News"
│
└── p
      └── "Today's headlines..."
Here:
<section>is the parent.<h2>and<p>are children.
Understanding this hierarchy is important for both CSS and JavaScript.
Sibling Elements
Elements sharing the same parent are called siblings.
Example:
1
2
3
4
5
6
7
8
9
<ul>

<li>Apple</li>

<li>Orange</li>

<li>Mango</li>

</ul>
DOM:
1
2
3
4
5
ul
│
├── li
├── li
└── li
Each <li> is a sibling of the others.
Nested Elements
HTML allows elements inside other elements.
Example:
1
2
3
4
5
<p>

Welcome to <strong>HTML</strong> programming.

</p>
DOM:
1
2
3
4
5
6
p
│
├── "Welcome to "
├── strong
│      └── "HTML"
└── " programming."
Notice that the paragraph contains:
- A text node
- A
<strong>element - Another text node
This mixture of text and elements is very common in HTML.
Whitespace in HTML
Browsers simplify most whitespace automatically.
Example:
1
2
3
4
5
6
7
8
<p>

Hello


World

</p>
The browser displays:
1
Hello World
Multiple spaces, tabs, and line breaks are usually collapsed into a single space.
This behavior helps HTML remain readable for developers.
Preserving Whitespace
Sometimes you want whitespace to remain exactly as written.
Example:
1
2
3
4
5
<pre>
Line One
    Line Two
        Line Three
</pre>
The <pre> element preserves:
- Spaces
- Tabs
- Line breaks
We’ll study <pre> in detail later in this book.
HTML Comments
Comments allow developers to leave notes inside HTML.
Example:
1
<!-- Main Navigation Starts Here -->
Comments:
- Are ignored by the browser during rendering.
- Are not displayed on the webpage.
- Help developers understand the document.
Use comments to explain complex sections or mark important areas of your code.
Character References (HTML Entities)
Some characters have special meaning in HTML.
For example:
1
2
3
4
5
<
>
&
"
'
To display them as text, HTML uses character references, also called entities.
Examples:
| Character | Entity |
|---|---|
< | < |
> | > |
& | & |
" | " |
' | ' (XML/XHTML) or ' (widely used in HTML) |
Example:
1
<p><h1>Hello</h1></p>
Displays:
1
<h1>Hello</h1>
Without entities, the browser would interpret the text as actual HTML tags.
Browser Processing
When the browser reads the <body>, it roughly performs these steps:
1
2
3
4
5
6
7
8
9
10
11
12
13
14
15
16
17
18
19
20
21
22
23
24
25
Read HTML
      │
      ▼

Create Element Nodes
      │
      ▼

Create Text Nodes
      │
      ▼

Resolve Character References
      │
      ▼

Ignore Comments
      │
      ▼

Construct DOM Tree
      │
      ▼

Render Content
This process happens extremely quickly, often in just milliseconds.
Common Mistakes
Thinking Text Is an Element
Remember:
1
<p>Hello</p>
<p> is the element.
Hello is a text node.
Using Too Many Comments
Comments should explain code when necessary.
Avoid commenting every obvious line.
Forgetting Character References
Writing:
1
<p>5 < 10</p>
can produce unexpected results because the browser may interpret < 10 as the beginning of a tag.
Correct:
1
<p>5 < 10</p>
Best Practices
Professional developers should:
- Understand the difference between elements and text nodes.
- Write meaningful comments when they add value.
- Use HTML entities for reserved characters.
- Structure content with proper parent–child relationships.
- Keep indentation consistent for readability.
Did You Know?
Even a simple webpage containing one heading and one paragraph is internally represented by the browser as a tree of interconnected nodes. JavaScript, CSS, accessibility tools, and browser extensions all work with this DOM tree rather than the raw HTML source.
Summary
In this section, you learned:
- What nodes are.
- The difference between element nodes and text nodes.
- Parent, child, and sibling relationships.
- Nested elements.
- How browsers handle whitespace.
- The purpose of HTML comments.
- How character references (entities) work.
- How the browser constructs the DOM.
Coming Up Next
In the next section of Chapter 5, we’ll begin our study of the first visible HTML elements:
- HTML Headings (
<h1>to<h6>) - Their semantic meaning
- Document outline
- Accessibility considerations
- SEO best practices
- Common mistakes
- Real-world examples
The heading elements are much more than simply “big text”—they define the logical structure of every HTML document.
HTML Heading Elements (<h1>–<h6>) — Structuring Documents with Meaning
Heading elements are among the most important HTML elements because they provide the structural outline of a document.
They help:
- Readers understand the organization of content.
- Browsers interpret document structure.
- Search engines understand the page hierarchy.
- Screen readers navigate efficiently.
- Developers create maintainable documents.
Although browsers display headings with different font sizes by default, their real purpose is semantic, not visual.
What Are Heading Elements?
HTML provides six levels of headings:
1
2
3
4
5
6
<h1>
<h2>
<h3>
<h4>
<h5>
<h6>
Each level represents a different level of importance within the document.
Think of them like the chapters and sections in a book.
Basic Example
1
2
3
4
5
6
7
8
9
10
11
<h1>The Solar System</h1>

<h2>Planets</h2>

<h3>Earth</h3>

<h3>Mars</h3>

<h2>Dwarf Planets</h2>

<h3>Pluto</h3>
The browser displays progressively smaller headings by default, but more importantly, it understands their hierarchical relationship.
Heading Hierarchy
A well-structured document follows a logical outline.
Example:
1
2
3
4
5
6
7
8
9
10
11
12
13
<h1>Book Title</h1>

    <h2>Chapter 1</h2>

        <h3>Section 1.1</h3>

        <h3>Section 1.2</h3>

    <h2>Chapter 2</h2>

        <h3>Section 2.1</h3>

            <h4>Topic 2.1.1</h4>
Each heading introduces the content that follows it.
Think of a Book
Imagine a printed textbook.
1
2
3
4
5
6
7
8
9
10
11
Book Title
│
├── Chapter
│      │
│      ├── Section
│      │      │
│      │      └── Topic
│      │
│      └── Section
│
└── Chapter
HTML headings work exactly the same way.
What Does <h1> Represent?
<h1> is the highest-level heading.
It usually represents:
- The title of a webpage.
- The main topic.
- The primary subject being discussed.
Example:
1
<h1>The Complete HTML Reference</h1>
Everything else on the page should relate to this primary heading.
What About <h2>?
<h2> introduces major sections of the document.
Example:
1
2
3
4
5
6
7
8
9
<h1>HTML Tutorial</h1>

<h2>Introduction</h2>

<h2>History</h2>

<h2>Elements</h2>

<h2>Attributes</h2>
Each <h2> divides the page into major topics.
What About <h3>?
<h3> introduces subsections within an <h2>.
Example:
1
2
3
4
5
6
7
<h2>Elements</h2>

<h3>Headings</h3>

<h3>Paragraphs</h3>

<h3>Images</h3>
These headings further organize the content.
The Remaining Levels
<h4>, <h5>, and <h6> continue the hierarchy.
Example:
1
2
3
4
5
6
h1
 └── h2
      └── h3
            └── h4
                  └── h5
                        └── h6
In practice:
<h1>–<h3>are commonly used.<h4>–<h6>appear in long technical documentation, legal documents, books, and large applications.
Default Browser Appearance
Most browsers display headings like this:
| Element | Default Appearance |
|---|---|
<h1> | Largest |
<h2> | Slightly smaller |
<h3> | Medium |
<h4> | Small |
<h5> | Smaller |
<h6> | Smallest |
These sizes are browser defaults.
You can completely change them with CSS.
Headings Are Not About Font Size
Many beginners write:
1
<h2>This text looks nice.</h2>
simply because they want a medium-sized font.
This is incorrect.
Use headings only when introducing a new section.
If you only want larger text, use CSS.
Example:
1
2
3
<p class="large-text">
    Important Announcement
</p>
.large-text { font-size: 2rem; }
Browser Interpretation
When the browser parses:
1
2
3
4
5
<h1>HTML</h1>

<h2>Introduction</h2>

<p>HTML is the standard markup language...</p>
The DOM becomes:
1
2
3
4
5
6
7
8
9
10
body
│
├── h1
│     └── "HTML"
│
├── h2
│     └── "Introduction"
│
└── p
      └── "HTML is the standard markup language..."
Each heading is represented as an independent element node.
Accessibility Benefits
Screen readers provide shortcuts for navigating headings.
For example, a user can move directly from one heading to another without reading the entire page.
A logical heading hierarchy greatly improves accessibility for people using assistive technologies.
Poor heading structure makes navigation difficult.
SEO Benefits
Search engines analyze headings to understand the organization of content.
A clear hierarchy helps indicate:
- Main topic
- Major sections
- Supporting information
Headings alone do not guarantee higher rankings, but they contribute to a well-structured, understandable page.
Common Mistakes
Using Headings Only for Appearance
Incorrect:
1
<h3>Click Here</h3>
if the text is not actually a heading.
Skipping Levels Without Reason
Example:
1
2
3
<h1>Programming</h1>

<h4>Variables</h4>
This creates an illogical hierarchy.
Prefer:
1
2
3
<h1>Programming</h1>

<h2>Variables</h2>
Using Multiple Headings Where Paragraphs Are Better
Not every bold or important sentence needs to become a heading.
Use headings only to introduce a new topic or section.
Best Practices
Professional developers should:
- Use headings to organize content logically.
- Start with one primary
<h1>for the main topic of the page (while HTML5 technically allows multiple<h1>elements in certain contexts, a single clear page-level<h1>remains the most widely recommended approach for clarity and compatibility). - Follow a logical hierarchy whenever possible.
- Avoid choosing heading levels based on appearance.
- Style headings with CSS rather than relying on browser defaults.
- Write clear, descriptive heading text.
Experiment
Create a file named headings.html.
Type:
1
2
3
4
5
6
7
8
9
10
11
12
13
14
15
16
17
18
19
20
21
22
23
24
25
26
27
<!DOCTYPE html>

<html lang="en">

<head>
    <title>Heading Example</title>
</head>

<body>

<h1>My Travel Guide</h1>

<h2>Europe</h2>

<h3>France</h3>

<h3>Italy</h3>

<h2>Asia</h2>

<h3>Japan</h3>

<h3>India</h3>

</body>

</html>
Open it in your browser.
Notice how the browser displays the hierarchy automatically, even without any CSS.
Did You Know?
Search engines, screen readers, browser extensions, and accessibility tools all rely on heading structure to understand how a document is organized. For humans, headings improve readability; for software, they provide meaning and navigation.
Summary
In this section, you learned:
- What heading elements are.
- The purpose of
<h1>through<h6>. - Why headings define structure rather than appearance.
- How browsers interpret heading elements.
- Accessibility and SEO benefits.
- Common mistakes.
- Professional best practices.
Coming Up Next
In the next section, we’ll explore heading hierarchy in depth, including:
- Should a page have one or multiple
<h1>elements? - HTML5 outlining concepts.
- Nested sections and semantic headings.
- Real-world document structures.
- Accessibility recommendations.
- Practical patterns used by modern websites and documentation systems.
Heading Hierarchy — Building a Logical Document Structure
A heading is much more than a large piece of text.
Every heading introduces a new section of content.
Together, all headings create the logical structure of a document.
Think of headings as the table of contents for your webpage.
Why Does Heading Hierarchy Matter?
Imagine reading a textbook without chapters or section titles.
Everything would appear as one continuous block of text.
Finding information would become difficult.
HTML headings solve this problem by dividing content into meaningful sections.
Example:
1
2
3
4
5
6
7
8
9
Book
│
├── Chapter
│
├── Section
│
├── Topic
│
└── Subtopic
HTML uses heading levels to represent this hierarchy.
A Proper Heading Structure
Example:
1
2
3
4
5
6
7
8
9
10
11
<h1>HTML Reference</h1>

<h2>Introduction</h2>

<h2>HTML Elements</h2>

<h3>Headings</h3>

<h3>Paragraphs</h3>

<h2>HTML Attributes</h2>
Hierarchy:
1
2
3
4
5
6
7
8
9
HTML Reference
│
├── Introduction
│
├── HTML Elements
│     ├── Headings
│     └── Paragraphs
│
└── HTML Attributes
Every heading level introduces a subsection of the level above it.
Can a Page Have More Than One <h1>?
This question has caused confusion for years.
From a technical perspective:
- HTML allows multiple
<h1>elements. - Browsers can render them without errors.
However, in practice:
- A single primary
<h1>that represents the main topic of the page is the clearest approach. - Additional sections should usually begin with
<h2>, followed by deeper levels as needed.
For most websites, blogs, documentation, and tutorials, one clear page-level <h1> is the recommended pattern.
Why the Confusion?
Early HTML5 drafts introduced a document outlining algorithm that suggested each sectioning element could have its own <h1>.
Example:
1
2
3
4
5
6
7
8
9
10
11
<article>

<h1>Article Title</h1>

<section>

<h1>Introduction</h1>

</section>

</article>
Although this was part of the specification’s outlining concept, browsers, search engines, and assistive technologies did not broadly implement the automatic outline as originally envisioned.
As a result, most developers continue to use a traditional heading hierarchy for maximum clarity and compatibility.
One Main Topic Per Page
Imagine a webpage titled:
1
The Complete HTML Reference
The document structure could be:
1
2
3
4
5
6
7
8
9
<h1>The Complete HTML Reference</h1>

<h2>Introduction</h2>

<h2>Elements</h2>

<h2>Attributes</h2>

<h2>Examples</h2>
This immediately communicates the page’s primary subject.
Skipping Heading Levels
Consider:
1
2
3
<h1>Programming</h1>

<h4>Variables</h4>
Although browsers display both headings, the structure is difficult to follow.
A better approach:
1
2
3
<h1>Programming</h1>

<h2>Variables</h2>
You don’t need to use every heading level in every document, but when moving deeper into a topic, the hierarchy should remain logical.
Headings and Sectioning Elements
Semantic elements such as:
1
2
3
4
5
6
7
<section>

<article>

<nav>

<aside>
help organize a document.
Headings describe the content within those sections.
Example:
1
2
3
4
5
6
7
8
9
10
11
12
13
14
15
16
17
18
19
20
21
<article>

<h1>Learning HTML</h1>

<section>

<h2>History</h2>

<p>...</p>

</section>

<section>

<h2>Modern HTML</h2>

<p>...</p>

</section>

</article>
The sections group related content, while the headings identify each group.
Accessibility and Heading Navigation
Many screen readers allow users to jump directly between headings.
For example, a user may navigate:
1
2
3
4
5
6
7
8
9
10
11
12
13
Heading 1

↓

Heading 2

↓

Heading 2

↓

Heading 3
If heading levels are inconsistent, navigating the document becomes more difficult.
A logical hierarchy improves the experience for users of assistive technologies.
Search Engines and Headings
Search engines analyze headings to understand the organization of a page.
They may use headings to identify:
- The primary topic.
- Major sections.
- Supporting information.
Good headings improve clarity, but they are only one part of overall search engine optimization.
Useful content, good site structure, performance, and many other factors also contribute to search visibility.
Visual Appearance Is Independent
The browser’s default styles make <h1> larger than <h2>, and so on.
However, CSS can completely change their appearance.
Example:
1
2
3
4
5
6
7
8
h1,
h2,
h3,
h4,
h5,
h6 {
    font-size: 24px;
}
Even if all headings appear the same size, their semantic meaning remains unchanged.
Real-World Example
Imagine the homepage of an online learning platform.
1
2
3
4
5
6
7
8
9
10
HTML Academy
│
├── Courses
│     ├── HTML
│     ├── CSS
│     └── JavaScript
│
├── Tutorials
│
└── Contact
Possible HTML:
1
2
3
4
5
6
7
8
9
10
11
12
13
<h1>HTML Academy</h1>

<h2>Courses</h2>

<h3>HTML</h3>

<h3>CSS</h3>

<h3>JavaScript</h3>

<h2>Tutorials</h2>

<h2>Contact</h2>
The structure mirrors the logical organization of the content.
Common Mistakes
Choosing Heading Levels by Font Size
Incorrect:
1
<h4>Important Notice</h4>
just because the font size looks appropriate.
Instead, choose the heading level based on the document structure and adjust the appearance with CSS.
Multiple Unrelated <h1> Elements
Avoid using several <h1> elements simply because they appear large.
If the page has one main topic, use one primary <h1>.
Empty Headings
Incorrect:
1
<h2></h2>
Every heading should introduce meaningful content.
Best Practices
Professional developers should:
- Give every page a clear primary heading.
- Organize content with logical heading levels.
- Use headings to introduce new sections.
- Style headings with CSS rather than choosing heading levels for appearance.
- Keep heading text concise and descriptive.
- Avoid skipping levels without a good structural reason.
Experiment
Create a file named heading-hierarchy.html.
Type:
1
2
3
4
5
6
7
8
9
10
11
12
13
14
15
16
17
18
19
20
21
22
23
24
25
<!DOCTYPE html>

<html lang="en">

<head>
    <title>Heading Hierarchy</title>
</head>

<body>

<h1>Space Exploration</h1>

<h2>Solar System</h2>

<h3>Mercury</h3>

<h3>Venus</h3>

<h2>Beyond the Solar System</h2>

<h3>Exoplanets</h3>

</body>

</html>
Open the page in your browser.
Notice how the heading sizes reflect their levels, but remember that their primary purpose is to communicate the document’s structure—not its visual design.
Did You Know?
A well-organized heading hierarchy benefits many tools beyond browsers. Search engines, screen readers, browser reader modes, document converters, and accessibility checkers all use headings to understand the structure and organization of a webpage.
Summary
In this section, you learned:
- Why heading hierarchy matters.
- The practical guidance on using one primary
<h1>. - The history behind the HTML5 outlining concept.
- How sectioning elements and headings work together.
- Accessibility and SEO considerations.
- Common mistakes.
- Professional best practices.
Coming Up Next
In the next section, we’ll examine the attributes available on heading elements, including:
- Global attributes
idclassstyletitlelangdirhiddentabindexcontenteditabledraggablespellcheck
You’ll also learn how these attributes make headings more interactive, accessible, and easier to style and reference throughout a webpage.
Attributes of Heading Elements (<h1>–<h6>)
Unlike some HTML elements, heading elements do not have many attributes that are unique to headings.
Instead, they support the complete set of Global Attributes, which means they behave consistently with most other HTML elements.
Understanding these attributes now will help you throughout the rest of HTML because the same attributes appear on hundreds of elements.
General Syntax
1
2
3
<h1 attribute="value">
    Heading Text
</h1>
Example:
1
2
3
<h1 id="main-title">
    HTML Tutorial
</h1>
The id Attribute
The id attribute uniquely identifies an element within the page.
Example:
1
2
3
<h1 id="introduction">
    Introduction
</h1>
Every id must be unique.
Correct:
1
2
3
4
5
6
7
<h1 id="chapter1">
Chapter 1
</h1>

<h2 id="chapter2">
Chapter 2
</h2>
Incorrect:
1
2
3
4
5
6
7
<h1 id="title">
First
</h1>

<h2 id="title">
Second
</h2>
Duplicate IDs create invalid HTML and may confuse CSS and JavaScript.
Why id Is Important
The id attribute allows:
- CSS styling
- JavaScript selection
- Internal page navigation
- Browser bookmarks
- URL fragments
Example:
1
2
3
<h2 id="installation">
Installation
</h2>
Users can jump directly to:
1
page.html#installation
Large documentation websites rely heavily on this feature.
The class Attribute
The class attribute groups elements together.
Example:
1
2
3
<h2 class="chapter-title">
Chapter One
</h2>
CSS:
1
2
3
.chapter-title{
    color: darkblue;
}
Multiple headings can share the same class.
1
2
3
4
5
6
7
8
9
10
11
<h2 class="chapter-title">
HTML
</h2>

<h2 class="chapter-title">
CSS
</h2>

<h2 class="chapter-title">
JavaScript
</h2>
Unlike id, classes are intended to be reused.
Multiple Classes
An element may belong to more than one class.
Example:
1
2
3
<h1 class="title featured center">
Welcome
</h1>
Here the heading belongs simultaneously to:
- title
- featured
- center
Each class can contribute different CSS rules.
The style Attribute
The style attribute applies inline CSS.
Example:
1
2
3
<h1 style="color:red;">
Hello
</h1>
Although valid, excessive inline styling is discouraged.
Better:
1
2
3
<h1 class="heading">
Hello
</h1>
Then define the appearance in a stylesheet.
The title Attribute
The title attribute provides additional information.
Example:
1
2
3
<h2 title="HyperText Markup Language">
HTML
</h2>
Many browsers display this value as a tooltip when the user hovers over the heading.
The title attribute can also be used by some assistive technologies, but it should not replace visible labels or descriptive content.
The lang Attribute
The lang attribute specifies the language of the element.
Example:
1
2
3
<h2 lang="fr">
Bonjour
</h2>
Another example:
1
2
3
<h2 lang="ta">
வணக்கம்
</h2>
Benefits include:
- Improved accessibility.
- Better pronunciation by screen readers.
- Enhanced language detection.
The dir Attribute
The dir attribute controls text direction.
Values include:
1
2
3
4
5
ltr

rtl

auto
Example:
1
2
3
<h2 dir="rtl">
مرحبا
</h2>
This is useful for languages written from right to left.
The hidden Attribute
The hidden attribute removes an element from normal rendering.
Example:
1
2
3
<h2 hidden>
Hidden Heading
</h2>
The browser does not display it.
JavaScript can later reveal it if needed.
The tabindex Attribute
Normally, headings are not focusable using the keyboard.
Adding:
1
2
3
<h2 tabindex="0">
Section Title
</h2>
allows users to move keyboard focus to the heading.
This can improve navigation in some interactive interfaces.
The contenteditable Attribute
Example:
1
2
3
<h2 contenteditable="true">
Edit Me
</h2>
The user can modify the heading directly in the browser.
This feature is commonly used in:
- Rich text editors.
- Content management systems.
- Document editing applications.
The draggable Attribute
Example:
1
2
3
<h2 draggable="true">
Drag Me
</h2>
This enables dragging behavior.
JavaScript is usually added to define what happens during the drag-and-drop operation.
The spellcheck Attribute
Example:
1
2
3
<h2 spellcheck="true">
Welcom To HTML
</h2>
Some browsers may highlight misspelled words when editing is enabled (for example, together with contenteditable).
This attribute is most useful on editable content.
The translate Attribute
The translate attribute tells translation tools whether an element’s content should be translated.
Example:
1
2
3
<h2 translate="no">
HTML
</h2>
This can help preserve product names, code terms, or brand names during automatic translation.
The data-* Attributes
Custom data can be stored using data-* attributes.
Example:
1
2
3
<h2 data-chapter="5">
Headings
</h2>
JavaScript can later read:
1
data-chapter = 5
These attributes are widely used for storing application-specific information without affecting the HTML semantics.
Combining Multiple Attributes
A heading may use several attributes together.
Example:
1
2
3
4
5
6
7
8
9
<h1
    id="main-title"
    class="title hero"
    lang="en"
    data-section="home">

Welcome to HTML

</h1>
Each attribute serves a different purpose:
| Attribute | Purpose |
|---|---|
id | Unique identifier |
class | Styling and grouping |
lang | Language information |
data-section | Custom application data |
Browser Interpretation
When the browser reads:
1
2
3
4
5
<h2
    id="tutorial"
    class="chapter">
HTML Tutorial
</h2>
It creates a DOM node containing:
1
2
3
4
5
6
7
8
9
Element:
    h2

Attributes:
    id
    class

Text:
    HTML Tutorial
Attributes become part of the element’s metadata within the DOM.
Common Mistakes
Using Duplicate IDs
Incorrect:
1
2
3
<h1 id="title">One</h1>

<h2 id="title">Two</h2>
IDs should be unique within a document.
Overusing Inline Styles
Avoid:
1
2
3
<h1 style="color:red;font-size:50px;">
Hello
</h1>
Move styling into CSS whenever practical.
Meaningless Class Names
Poor:
1
<h2 class="blue">
Better:
1
<h2 class="chapter-title">
Choose names that describe the element’s role rather than its appearance.
Best Practices
Professional developers should:
- Use unique IDs.
- Reuse classes appropriately.
- Keep presentation in CSS.
- Use
langanddirwhen necessary. - Store custom information with
data-*attributes. - Avoid unnecessary inline styles.
- Write meaningful attribute values.
Experiment
Create a file named heading-attributes.html.
Type:
1
2
3
4
5
6
7
8
9
10
11
12
13
14
15
16
17
18
19
20
21
22
23
24
25
26
27
28
29
30
31
32
<!DOCTYPE html>

<html lang="en">

<head>

<title>Heading Attributes</title>

<style>

.heading{
    color: darkblue;
}

</style>

</head>

<body>

<h1
id="main"
class="heading"
title="Main Heading">

Welcome to HTML

</h1>

</body>

</html>
Open the page in your browser.
Inspect the heading using Developer Tools.
Notice how the browser stores both the element and its attributes in the DOM.
Did You Know?
Global attributes are shared by most HTML elements. Once you understand them on headings, you’ll be able to apply the same knowledge to paragraphs, images, lists, tables, forms, and many other HTML elements throughout this book.
Summary
In this section, you learned:
- Why heading elements use global attributes.
- The purpose of
id,class,style,title,lang, anddir. - How
hidden,tabindex,contenteditable,draggable,spellcheck,translate, anddata-*work. - Common mistakes.
- Professional best practices.
Coming Up Next
In the next section, we’ll conclude the heading chapter by exploring:
- Nested headings in real-world websites.
- Headings inside
<article>,<section>,<aside>, and<nav>. - Accessibility patterns.
- SEO case studies.
- Practical layouts used by blogs, documentation sites, and news portals.
After that, we’ll move on to the next major HTML element:
The <p> (Paragraph) Element—far more sophisticated than simply “a block of text.”
Headings in Real-World HTML Documents
Up to this point, you’ve learned:
- What heading elements are.
- How heading hierarchy works.
- The importance of semantic structure.
- Global attributes available on headings.
Now let’s see how headings are used in actual websites.
Professional webpages are not built from isolated headings—they combine headings with semantic HTML elements to create a logical, accessible document structure.
Headings Inside an Article
Consider a blog article.
1
2
3
4
5
6
7
8
9
10
11
12
13
14
15
16
17
18
19
<article>

<h1>The Complete HTML Reference</h1>

<p>Introduction...</p>

<h2>History of HTML</h2>

<p>...</p>

<h2>HTML Elements</h2>

<p>...</p>

<h3>Heading Elements</h3>

<p>...</p>

</article>
Hierarchy:
1
2
3
4
5
6
7
Article
│
├── h1
│
├── h2
│
└── h3
This creates a clear reading flow for both humans and software.
Headings Inside <section>
Sections divide a page into logical groups.
Example:
1
2
3
4
5
6
7
8
9
10
11
12
13
14
15
<section>

<h2>Features</h2>

<p>...</p>

</section>

<section>

<h2>Pricing</h2>

<p>...</p>

</section>
Each section begins with a heading describing its content.
Without headings, sections become difficult to identify.
Headings Inside Navigation
Navigation menus sometimes include headings.
Example:
1
2
3
4
5
6
7
8
9
10
11
12
13
14
15
<nav>

<h2>Documentation</h2>

<ul>

<li><a href="#">HTML</a></li>

<li><a href="#">CSS</a></li>

<li><a href="#">JavaScript</a></li>

</ul>

</nav>
The heading provides context for the navigation links.
Headings Inside <aside>
An aside contains related information.
Example:
1
2
3
4
5
6
7
8
9
10
11
12
13
14
15
<aside>

<h2>Related Articles</h2>

<ul>

<li>HTML Basics</li>

<li>CSS Introduction</li>

<li>JavaScript Guide</li>

</ul>

</aside>
Users immediately understand the purpose of the sidebar.
Headings Inside Cards
Modern websites often use cards.
Example:
1
2
3
4
5
6
7
8
9
10
11
12
13
14
15
<div class="card">

<h3>HTML Course</h3>

<p>Beginner friendly.</p>

</div>

<div class="card">

<h3>CSS Course</h3>

<p>Learn modern layouts.</p>

</div>
Each card has its own heading describing its content.
Headings in News Websites
News portals usually organize content like this:
1
2
3
4
5
6
7
8
9
10
11
Homepage
│
├── Main Story (h1)
│
├── World News (h2)
│
├── Politics (h2)
│
├── Technology (h2)
│
└── Sports (h2)
Within each category, individual stories may use lower-level headings depending on the page structure.
Headings in Documentation Websites
Documentation websites rely heavily on heading hierarchy.
Example:
1
2
3
4
5
6
7
8
9
10
11
12
13
HTML Documentation
│
├── Introduction
│
├── Installation
│
│     ├── Windows
│     ├── Linux
│     └── macOS
│
├── Examples
│
└── API Reference
This organization allows readers to quickly locate information.
Headings and Table of Contents
Many documentation systems automatically generate a table of contents from headings.
Example HTML:
1
2
3
4
5
6
7
8
9
10
11
<h1>HTML Guide</h1>

<h2>Introduction</h2>

<h2>Elements</h2>

<h3>Paragraphs</h3>

<h3>Lists</h3>

<h2>Conclusion</h2>
Automatically generated table of contents:
1
2
3
4
5
6
7
8
9
HTML Guide

• Introduction

• Elements
    • Paragraphs
    • Lists

• Conclusion
This is one reason why logical heading levels are so important.
Headings and Accessibility
Screen readers often provide a list of headings on the page.
Example:
1
2
3
4
5
6
7
8
9
10
11
12
13
Heading List

1. HTML Guide

2. Introduction

2. Elements

3. Paragraphs

3. Lists

2. Conclusion
Users can jump directly to the section they need without reading every paragraph.
This greatly improves navigation.
Headings and CSS
Never choose a heading level because you like its default appearance.
Instead:
1
2
3
<h2 class="page-heading">
HTML Tutorial
</h2>
1
2
3
4
.page-heading{
    font-size:48px;
    color:#004aad;
}
The semantic meaning stays correct while the design becomes completely customizable.
Headings and JavaScript
JavaScript frequently interacts with headings.
Example:
1
2
3
4
5
6
7
8
9
10
<h2 id="status">
Loading...
</h2>

<script>

document.getElementById("status").textContent =
"Page Loaded";

</script>
The heading changes dynamically after the page loads.
Responsive Design
Heading sizes often change on different devices.
Desktop:
1
48px
Tablet:
1
36px
Mobile:
1
28px
The HTML stays exactly the same.
Only the CSS changes.
This demonstrates another reason why heading levels should never be chosen for appearance.
Internationalization
Headings can be translated without changing the document structure.
English:
1
<h1>Contact Us</h1>
Spanish:
1
<h1>Contáctenos</h1>
Japanese:
1
<h1>お問い合わせ</h1>
The heading remains an <h1> regardless of language.
Common Mistakes
Using Headings as Buttons
Incorrect:
1
<h2>Click Here</h2>
If users are expected to click something, use an appropriate interactive element such as a button or a link, depending on the intended behavior.
Using Empty Headings for Spacing
Incorrect:
1
<h2></h2>
Spacing should be created with CSS margins or padding, not empty HTML elements.
Using Headings Everywhere
Not every bold sentence is a heading.
A heading introduces a new section.
If the text does not begin a new topic, it probably should not be a heading.
Best Practices
Professional developers should:
- Begin each major section with an appropriate heading.
- Keep heading text short and descriptive.
- Maintain a logical hierarchy.
- Use CSS for visual styling.
- Test heading navigation with accessibility tools.
- Avoid unnecessary heading levels.
Mini Project
Create a file named website-outline.html.
1
2
3
4
5
6
7
8
9
10
11
12
13
14
15
16
17
18
19
20
21
22
23
24
25
26
27
28
29
30
31
32
33
34
35
36
37
<!DOCTYPE html>

<html lang="en">

<head>

<title>Website Outline</title>

</head>

<body>

<h1>My Technology Blog</h1>

<h2>Latest Articles</h2>

<h3>HTML</h3>

<p>...</p>

<h3>CSS</h3>

<p>...</p>

<h2>Tutorials</h2>

<h3>Beginner Guides</h3>

<p>...</p>

<h3>Advanced Guides</h3>

<p>...</p>

</body>

</html>
Open the page in your browser.
Read the headings only.
You should still understand the overall structure of the page without reading the paragraphs.
This is a useful way to check whether your heading hierarchy is logical.
Did You Know?
Browser reader modes, accessibility software, search engines, documentation generators, and many content management systems all rely on heading structure to organize information. A well-designed heading hierarchy improves both human readability and machine understanding.
Summary
In this section, you learned:
- How headings are used in real-world websites.
- How they work with semantic elements such as
<article>,<section>,<nav>, and<aside>. - How tables of contents are generated from headings.
- How JavaScript and CSS interact with headings.
- Responsive design considerations.
- Accessibility and internationalization benefits.
- Professional best practices.
Heading Elements — Complete
You have now mastered the HTML heading elements, including:
<h1>through<h6>- Semantic meaning
- Document hierarchy
- Accessibility
- SEO considerations
- Global attributes
- Real-world usage
- Browser behavior
- Common mistakes
- Best practices
This concludes one of the most important foundational topics in HTML.
Coming Up Next
In the next section, we’ll begin our exploration of the <p> (Paragraph) element, including:
- What a paragraph really is.
- Block-level behavior.
- Browser default styling.
- Whitespace handling.
- Nested inline elements.
- Accessibility.
- Best practices.
- Common mistakes.
You’ll discover that <p> is much more than “just a block of text”—it is one of the most fundamental semantic elements in HTML.