Chapter 5.8 - The `<pre>` Element
Complete guide to the HTML `<pre>` element including whitespace preservation, browser rendering, code examples, accessibility, CSS, JavaScript, SEO, and best practices.
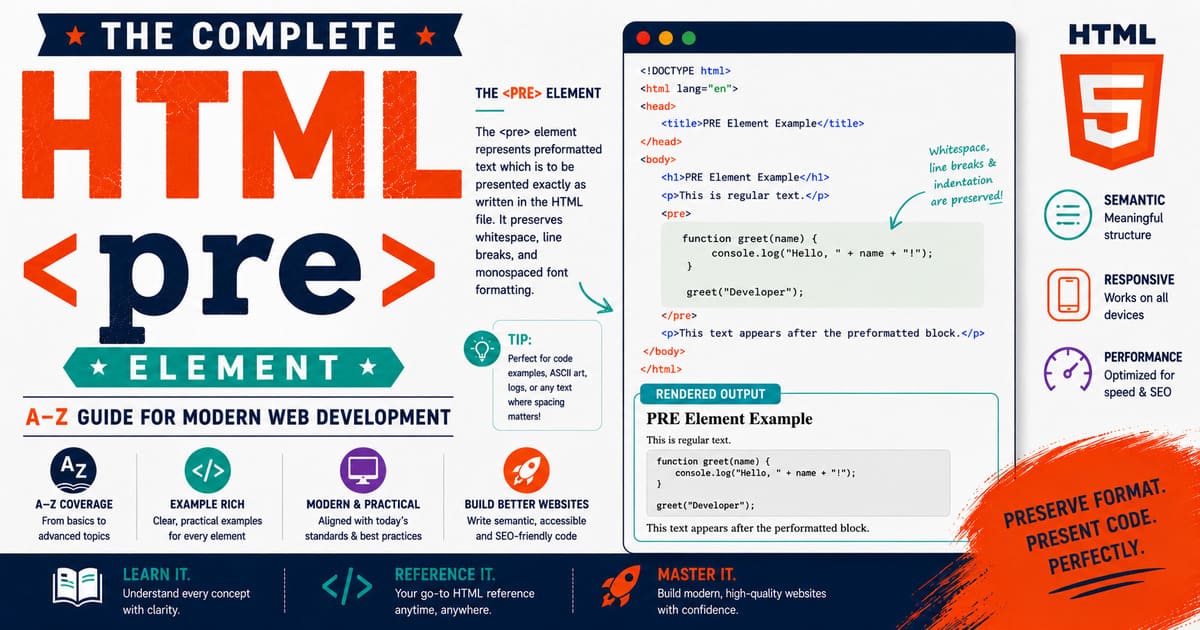
Chapter 5.8 — The <pre> Element
The <pre> element is one of the oldest HTML elements and remains one of the most useful.
Unlike ordinary HTML text, where browsers automatically collapse multiple spaces and ignore most line breaks, the <pre> element tells the browser:
“Display this text exactly as it appears in the HTML source.”
This simple instruction makes <pre> indispensable for programmers, technical writers, educators, scientists, and anyone who needs to preserve formatting.
Today, virtually every programming documentation website—including API documentation, developer guides, terminal tutorials, and educational platforms—uses the <pre> element extensively.
5.8.1 Introduction to the <pre> Element
The name pre stands for:
Preformatted Text
The browser assumes that the text has already been formatted by the author.
Instead of reformatting the content, it preserves:
- Spaces
- Tabs
- Line breaks
- Indentation
- Alignment
This behavior makes <pre> fundamentally different from ordinary paragraphs.
Why Was <pre> Introduced?
Early computer systems frequently displayed information that depended on exact spacing.
Examples included:
- Program source code
- Terminal output
- Configuration files
- ASCII art
- Tables made with spaces
- Log files
- Mathematical layouts
Without <pre>, browsers would collapse multiple spaces into a single space, destroying the intended formatting.
The <pre> element solved this problem by preserving the original layout.
Basic Syntax
The syntax is straightforward:
1
2
3
4
5
<pre>

Content goes here.

</pre>
Unlike <br>, <hr>, or <wbr>, the <pre> element is not a void element.
It requires both an opening tag and a closing tag.
A Simple Example
Consider the following HTML:
1
2
3
<p>
HTML     CSS     JavaScript
</p>
The browser displays:
1
HTML CSS JavaScript
Notice that multiple spaces have been collapsed into one.
Now compare it with:
1
2
3
<pre>
HTML     CSS     JavaScript
</pre>
The browser displays:
1
HTML     CSS     JavaScript
Every space is preserved exactly as written.
Preserving Line Breaks
Example:
1
2
3
4
5
<pre>
Line One
Line Two
Line Three
</pre>
Output:
1
2
3
Line One
Line Two
Line Three
Unlike ordinary HTML, no <br> elements are required.
The browser preserves the original line breaks automatically.
Preserving Indentation
One of the greatest strengths of <pre> is indentation.
Example:
1
2
3
4
5
6
7
8
<pre>
Chapter 1
    Section 1.1
        Topic A
        Topic B
    Section 1.2
Chapter 2
</pre>
Output:
1
2
3
4
5
6
Chapter 1
    Section 1.1
        Topic A
        Topic B
    Section 1.2
Chapter 2
Indentation remains exactly as typed.
Browser Rendering
When the browser encounters a <pre> element, it changes several default text-rendering rules.
Normally, browsers:
- Collapse multiple spaces.
- Ignore extra tabs.
- Ignore most line breaks.
- Wrap text according to the available width.
Inside <pre>:
- Spaces are preserved.
- Tabs are preserved.
- Newlines are preserved.
- Formatting is maintained.
The browser treats the content as preformatted text rather than ordinary prose.
Default Browser Appearance
Most browsers apply a built-in stylesheet similar to:
1
2
3
4
5
6
7
8
9
10
11
pre{

display:block;

font-family:monospace;

white-space:pre;

margin:1em 0;

}
This explains why <pre> usually appears:
- In a monospace font.
- On its own line.
- With preserved whitespace.
- With spacing above and below.
Although the exact styling varies slightly between browsers, the overall behavior is consistent.
Monospace Fonts
Browsers usually render <pre> using a monospace font such as:
- Courier New
- Consolas
- Monaco
- Menlo
- Liberation Mono
In a monospace font:
Every character occupies the same horizontal width.
Example:
1
2
3
IIIIIIII
WWWWWWWW
12345678
Each character aligns perfectly, making monospace fonts ideal for:
- Source code
- Terminal output
- Tables
- Configuration files
- Command-line examples
Comparing <pre> with <p>
| Feature | <p> | <pre> |
|---|---|---|
| Collapses spaces | ✅ | ❌ |
| Preserves line breaks | ❌ | ✅ |
| Preserves tabs | ❌ | ✅ |
| Default font | Proportional | Monospace |
| Suitable for code | ❌ | ✅ |
This comparison highlights why <pre> is the preferred choice whenever formatting matters.
Real-World Example
Suppose you’re writing a Linux tutorial.
Instead of:
1
2
3
4
5
<p>
mkdir myproject
cd myproject
touch index.html
</p>
Use:
1
2
3
4
5
<pre>
mkdir myproject
cd myproject
touch index.html
</pre>
Readers can now distinguish each command clearly, preserving the intended layout.
Common Use Cases
The <pre> element is commonly used for:
- Programming source code
- Terminal commands
- Shell scripts
- Configuration files
- Server logs
- ASCII diagrams
- Educational examples
- Technical documentation
- Database queries
- Network configurations
If preserving formatting is essential, <pre> is usually the correct choice.
Practical Exercise
Create a file named:
pre-introduction.html
1
2
3
4
5
6
7
8
9
10
11
12
13
14
15
16
17
18
19
20
21
22
23
24
25
26
27
28
29
30
31
<!DOCTYPE html>

<html lang="en">

<head>

<title>Learning PRE</title>

</head>

<body>

<h2>Paragraph</h2>

<p>

HTML     CSS     JavaScript

</p>

<h2>Preformatted Text</h2>

<pre>

HTML     CSS     JavaScript

</pre>

</body>

</html>
Open the page.
Compare the two outputs carefully.
Notice how the paragraph collapses whitespace, while the <pre> element preserves every space exactly as written.
Did You Know?
The
<pre>element is one of the few HTML elements whose primary purpose is to preserve whitespace. Without it, many programming tutorials, command-line guides, configuration examples, and technical documents would lose their formatting and become much harder to read.
Summary
In this section, you learned:
- What the
<pre>element is. - Why it was introduced.
- The meaning of “preformatted text.”
- How browsers preserve spaces and line breaks.
- Default browser rendering.
- Monospace fonts.
- Common real-world applications.
- The differences between
<pre>and<p>.
Coming Up Next — Section 5.8.2
In the next section, we’ll dive deeper into the HTML specification, content model, browser parsing, DOM representation, and whitespace preservation algorithms of the <pre> element, including:
- HTML Living Standard definition.
- Flow Content and Palpable Content categories.
- Parsing behavior.
- DOM representation.
- The
HTMLPreElementinterface. - Whitespace normalization rules.
- Leading newline behavior.
- Browser internals.
- XHTML compatibility.
- Common misconceptions.
This next section will reveal why the <pre> element behaves so differently from ordinary HTML elements and how browsers faithfully preserve its content.
5.8.2 HTML Specification, Content Model, Browser Parsing, DOM Representation, and Whitespace Preservation of <pre>
In the previous section, you learned that the <pre> element preserves spaces, tabs, and line breaks exactly as they appear in the HTML source.
However, this behavior raises several interesting questions:
- How do browsers know not to collapse whitespace?
- Is
<pre>a block element? - How is it represented inside the Document Object Model (DOM)?
- Why does it require both opening and closing tags?
- What exactly does the HTML Living Standard say about it?
This section answers those questions by examining the <pre> element from the perspective of browser internals and the HTML specification.
HTML Living Standard Definition
According to the HTML Living Standard, the <pre> element represents preformatted text whose formatting has already been determined by the author.
Unlike normal paragraphs, browsers should preserve the author’s intended whitespace rather than automatically reformatting it.
This makes <pre> particularly suitable for:
- Computer source code
- Command-line examples
- Configuration files
- ASCII diagrams
- Text requiring fixed alignment
The browser assumes that the formatting is meaningful and should remain unchanged.
Content Categories
The <pre> element belongs to several HTML content categories.
| Category | Included |
|---|---|
| Flow Content | ✅ |
| Palpable Content | ✅ |
Because it is Flow Content, it can appear almost anywhere block-level content is permitted.
Because it is Palpable Content, it contributes meaningful visible content to the document.
Is <pre> a Void Element?
No.
Unlike:
1
2
3
<br>
<hr>
<wbr>
the <pre> element is not a void element.
It must always contain content between an opening and closing tag.
Correct:
1
2
3
4
5
<pre>

Hello World

</pre>
Incorrect:
1
<pre>
Browsers may attempt error recovery when the closing tag is missing, but the markup is not valid HTML.
Browser Parsing
Suppose the browser encounters:
1
2
3
4
5
6
7
<pre>

HTML
CSS
JavaScript

</pre>
A simplified parsing process looks like this:
1
2
3
4
5
6
7
8
9
10
11
12
13
14
15
16
17
18
19
20
21
22
23
24
25
26
27
28
29
Read <pre>

↓

Create PRE Element

↓

Read Text

↓

Preserve Spaces

↓

Preserve Tabs

↓

Preserve Newlines

↓

Encounter </pre>

↓

Finish Element
Notice that the parser treats the enclosed text differently from ordinary HTML text.
DOM Representation
Consider the following HTML:
1
2
3
4
5
6
<pre>

Line One
Line Two

</pre>
The browser creates a simplified DOM structure:
1
2
3
4
5
6
7
8
9
Document
│
└── html
     │
     └── body
          │
          └── pre
               │
               └── Text Node
Unlike paragraphs that may contain multiple inline elements, a simple <pre> often contains a single text node preserving all whitespace characters.
The HTMLPreElement Interface
The DOM interface representing the <pre> element is:
1
HTMLPreElement
Its inheritance hierarchy is:
1
2
3
4
5
6
7
8
9
10
11
12
13
EventTarget
      │
      ▼
Node
      │
      ▼
Element
      │
      ▼
HTMLElement
      │
      ▼
HTMLPreElement
Because HTMLPreElement inherits from HTMLElement, it supports all standard HTML element properties and methods.
Common Properties
Some commonly used properties include:
| Property | Description |
|---|---|
id | Unique identifier |
className | CSS class names |
style | Inline CSS |
title | Tooltip text |
hidden | Hides the element |
textContent | Returns preserved text |
innerHTML | HTML content inside <pre> |
dataset | Access to custom data-* attributes |
Leading Newline Behavior
One interesting feature of the <pre> element is how browsers handle the first newline immediately after the opening tag.
Example:
1
2
3
4
<pre>
Hello
World
</pre>
Notice that the text begins on the line immediately following the opening tag.
According to the HTML specification, browsers ignore one leading newline if it appears directly after the opening <pre> tag.
This allows developers to format HTML source code neatly without introducing an unwanted blank line in the rendered output.
Example
Source:
1
2
3
4
<pre>
Line One
Line Two
</pre>
Rendered output:
1
2
Line One
Line Two
The blank line after <pre> does not appear in the browser.
However, additional blank lines remain preserved.
Whitespace Preservation Rules
Inside a <pre> element, browsers preserve:
- Multiple spaces
- Tab characters
- Line breaks
- Blank lines
- Indentation
Example:
1
2
3
4
5
<pre>
A
    B
        C
</pre>
Output:
1
2
3
A
    B
        C
The indentation remains exactly as written.
What About HTML Tags?
The browser still parses HTML tags inside <pre>.
Example:
1
2
3
4
5
<pre>

<b>Hello</b>

</pre>
Output:
Hello
The <b> element is still interpreted as HTML.
If your goal is to display the literal characters < and >, you must escape them.
Escaping HTML
Correct:
1
2
3
4
5
<pre>
<h1>Hello</h1>
</pre>
Output:
1
<h1>Hello</h1>
This is why programming tutorials often combine <pre> with escaped HTML entities.
Browser Rendering
After parsing, browsers generally apply a built-in stylesheet similar to:
1
2
3
4
5
6
7
8
9
pre{

display:block;

white-space:pre;

font-family:monospace;

}
The key property is:
1
white-space:pre;
This instructs the rendering engine to preserve whitespace exactly as authored.
XHTML Compatibility
In XHTML, the <pre> element behaves the same way.
Example:
1
2
3
4
5
<pre>

Sample Text

</pre>
The only major XHTML requirement is that all tags must be properly closed.
Common Misconceptions
Misconception 1
”
<pre>displays plain text.”
Incorrect.
HTML tags inside <pre> are still parsed unless escaped.
Misconception 2
”
<pre>is only for programming code.”
Incorrect.
It is useful for any text where formatting is meaningful, including:
- Poetry
- ASCII art
- Configuration files
- Terminal output
- Tables
- Scientific notation
Misconception 3
”
<pre>preserves everything.”
Not exactly.
The browser ignores one leading newline immediately after the opening tag, following the HTML specification.
Practical Exercise
Create a file named:
pre-parsing.html
1
2
3
4
5
6
7
8
9
10
11
12
13
14
15
16
17
18
19
20
21
22
23
24
<!DOCTYPE html>
<html lang="en">
<head>
<title>PRE Parsing</title>
</head>
<body>
<pre>
<h1>Hello World</h1>
Line One
Line Two
</pre>
</body>
</html>
Open the page.
Observe that:
- Spaces are preserved.
- Indentation remains intact.
- The escaped HTML tags appear as text rather than being interpreted by the browser.
Did You Know?
The
HTMLPreElementinterface has existed for decades, making<pre>one of the oldest specialized elements in the DOM. Despite its age, it remains essential for documentation websites, programming tutorials, terminal guides, and educational resources because no other HTML element preserves whitespace in exactly the same way.
Summary
In this section, you learned:
- The HTML Living Standard definition of
<pre>. - Content categories.
- Why
<pre>is not a void element. - Browser parsing behavior.
- DOM representation.
- The
HTMLPreElementinterface. - Leading newline handling.
- Whitespace preservation rules.
- Escaping HTML inside
<pre>. - Browser rendering behavior.
- Common misconceptions.
Coming Up Next — Section 5.8.3
In the next section, we’ll explore Displaying Source Code, Combining <pre> with <code>, CSS Styling, Syntax Highlighting, and Professional Documentation Techniques, including:
- Why
<pre>and<code>are often used together. - Displaying HTML, CSS, JavaScript, and terminal commands.
- Escaping special characters.
- Building code blocks for documentation.
- Syntax highlighting libraries.
- Copy-to-clipboard functionality.
- Responsive code blocks.
- Professional best practices.
This section will be especially valuable if you’re creating technical blogs, programming tutorials, API documentation, or educational websites.
5.8.3 Displaying Source Code, Combining <pre> with <code>, CSS Styling, Syntax Highlighting, and Professional Documentation Techniques
In the previous sections, you learned how the <pre> element preserves whitespace and how browsers parse and render preformatted text.
However, one question naturally arises:
If
<pre>preserves formatting, why do most programming websites place a<code>element inside it?
The answer lies in semantics.
While <pre> preserves formatting, the <code> element identifies the content as computer code.
Together, they form one of the most common and powerful combinations in modern technical documentation.
Why Use <pre> and <code> Together?
Consider the following HTML:
1
2
3
4
5
6
7
8
9
<pre>

function greet(){

    console.log("Hello");

}

</pre>
The formatting is preserved.
However, the browser has no semantic indication that the text represents program code.
Now compare it with:
1
2
3
4
5
6
7
8
9
<pre><code>

function greet(){

    console.log("Hello");

}

</code></pre>
Now:
<pre>preserves formatting.<code>identifies the content as source code.
This combination is recommended for programming documentation.
The Role of <code>
The <code> element represents:
A fragment of computer code.
It may contain:
- HTML
- CSS
- JavaScript
- Python
- SQL
- Bash commands
- JSON
- XML
- Configuration files
The browser usually displays <code> using a monospace font.
When nested inside <pre>, both formatting and semantics are preserved.
Displaying HTML Source Code
Suppose you want readers to see HTML tags rather than having the browser interpret them.
Incorrect:
1
2
3
4
5
<pre><code>

<h1>Hello</h1>

</code></pre>
The browser renders:
Hello
instead of displaying the source.
Correct:
1
2
3
4
5
<pre><code>
<h1>Hello</h1>
</code></pre>
Output:
1
<h1>Hello</h1>
Always escape special HTML characters when displaying HTML source code.
Displaying CSS
Example:
1
2
3
4
5
6
7
8
9
10
11
<pre><code>

body{

    background:white;

    color:black;

}

</code></pre>
The indentation remains intact.
Displaying JavaScript
Example:
1
2
3
4
5
6
7
8
9
<pre><code>

function add(a,b){

    return a+b;

}

</code></pre>
The preserved formatting makes the code much easier to read.
Displaying Terminal Commands
The <pre> element is equally useful for command-line tutorials.
Example:
1
2
3
4
5
6
7
8
9
<pre><code>

mkdir website

cd website

npm install

</code></pre>
Readers can copy the commands exactly as displayed.
Displaying JSON
Example:
1
2
3
4
5
6
7
8
9
10
11
<pre><code>

{

    "name":"Alice",

    "age":25

}

</code></pre>
Indentation is preserved, making structured data much easier to understand.
Displaying XML
Example:
1
2
3
4
5
6
7
8
9
<pre><code>
<book>
<title>HTML</title>
</book>
</code></pre>
Again, notice that angle brackets must be escaped.
CSS Styling for Code Blocks
The browser’s default appearance is functional but rather plain.
Professional websites usually apply custom CSS.
Example:
1
2
3
4
5
6
7
8
9
10
11
12
13
pre{

background:#1e1e1e;

color:#f8f8f2;

padding:20px;

border-radius:8px;

overflow:auto;

}
This produces a clean, modern code block with improved readability.
Preventing Horizontal Overflow
Long lines of code can extend beyond the viewport.
A common solution is:
1
2
3
4
5
pre{

overflow-x:auto;

}
This allows horizontal scrolling only when necessary.
The page layout remains intact.
Adding Line Numbers
Many documentation websites display line numbers.
Example:
1
2
3
4
5
1  function greet(){

2      console.log("Hello");

3  }
Although HTML itself does not generate line numbers, they can be added using:
- CSS counters
- JavaScript
- Static site generators
- Syntax-highlighting libraries
Syntax Highlighting
Plain code is readable.
Colorized code is even better.
Popular syntax-highlighting libraries include:
- Prism.js
- Highlight.js
- Shiki
These tools analyze the source code and wrap keywords, strings, comments, and operators in additional HTML elements that CSS can style with different colors.
For example:
1
const message = "Hello";
may appear with:
- Keywords in blue
- Strings in green
- Numbers in orange
- Comments in gray
Syntax highlighting greatly improves readability.
Copy-to-Clipboard Buttons
Modern documentation websites often include a small Copy button in the corner of each code block.
Example layout:
1
2
3
4
5
6
7
8
9
10
11
12
13
+----------------------------------+

Copy

------------------------------------

function greet(){

console.log("Hello");

}

+----------------------------------+
When clicked, JavaScript copies the code directly to the user’s clipboard.
This feature is now common on documentation sites and educational platforms.
Responsive Code Blocks
Mobile devices present an additional challenge.
Long code lines may exceed the screen width.
A professional solution is:
1
2
3
4
5
6
7
pre{

overflow-x:auto;

max-width:100%;

}
Users can scroll horizontally without breaking the page layout.
Accessibility
The <pre> and <code> combination is generally accessible.
Screen readers recognize that the content represents computer code.
However, extremely large code blocks may be difficult to navigate.
Professional documentation often provides:
- Clear headings
- Short explanatory paragraphs
- Well-organized examples
- Downloadable source files
These improvements make technical documentation easier for all users.
Common Mistakes
Mistake 1
Using <pre> without <code> for programming examples.
While technically valid, combining both elements provides better semantic meaning.
Mistake 2
Forgetting to escape HTML.
Incorrect:
1
<h1>Hello</h1>
Correct:
1
<h1>Hello</h1>
Mistake 3
Allowing code to overflow.
Always test long code samples on smaller screens.
Practical Exercise
Create a file named:
pre-code.html
1
2
3
4
5
6
7
8
9
10
11
12
13
14
15
16
17
18
19
20
21
22
23
24
25
26
27
28
29
30
31
32
33
34
35
36
37
<!DOCTYPE html>
<html lang="en">
<head>
<title>PRE and CODE</title>
<style>
pre{
background:#f4f4f4;
padding:15px;
overflow-x:auto;
}
</style>
</head>
<body>
<pre><code>
<h1>Hello World</h1>
<p>Learning HTML.</p>
</code></pre>
</body>
</html>
Open the page.
Observe how:
- Formatting is preserved.
- HTML tags appear as text.
- The code block remains readable.
- Horizontal scrolling appears only if necessary.
Did You Know?
Nearly every major documentation platform—including MDN Web Docs, programming language manuals, API documentation, and developer portals—uses the
<pre><code>combination to display source code. This pairing has become the de facto standard for presenting programming examples on the web.
Summary
In this section, you learned:
- Why
<pre>and<code>are commonly used together. - The semantic role of
<code>. - Displaying HTML, CSS, JavaScript, JSON, XML, and terminal commands.
- Escaping HTML correctly.
- CSS styling techniques.
- Syntax highlighting concepts.
- Copy-to-clipboard functionality.
- Responsive code blocks.
- Accessibility considerations.
- Professional documentation practices.
Coming Up Next — Section 5.8.4
In the next section, we’ll explore JavaScript, DOM Manipulation, CSS White-Space Modes, Accessibility, SEO, Browser Compatibility, Performance, and Professional Best Practices for <pre>, including:
- The
HTMLPreElementinterface. - Manipulating
<pre>with JavaScript. - Understanding
white-space: pre,pre-wrap,pre-line, andbreak-spaces. - Dynamic code generation.
- Accessibility APIs.
- Search engine behavior.
- Browser compatibility.
- Interview questions.
- Complete technical reference.
This next section will take your understanding of the <pre> element beyond markup and into the modern web application environment.
5.8.4 JavaScript, DOM Manipulation, CSS White-Space Modes, Accessibility, SEO, Browser Compatibility, Performance, and Professional Best Practices for <pre>
In the previous sections, we explored why <pre> is essential for displaying formatted text and source code.
We learned:
<pre>preserves whitespace.<code>adds semantic meaning for programming examples.- Developers use
<pre><code>for documentation and tutorials.
Now we move deeper into modern web development.
This section focuses on how <pre> behaves inside the browser environment, how JavaScript interacts with it, how CSS controls whitespace behavior, and what professional developers should consider when using it in production websites.
5.8.4.1 Accessing <pre> Through the DOM
Like every HTML element, <pre> becomes a node inside the Document Object Model.
Example:
1
2
3
4
5
<pre id="example">

Hello World

</pre>
JavaScript:
1
2
3
4
const block =
document.getElementById("example");

console.log(block);
Output:
1
2
3
4
5
<pre id="example">

Hello World

</pre>
The browser exposes the <pre> element through the DOM API.
The HTMLPreElement Interface
The DOM interface for <pre> is:
1
HTMLPreElement
It inherits from:
1
2
3
4
5
6
7
8
9
10
11
12
13
14
15
16
17
EventTarget

↓

Node

↓

Element

↓

HTMLElement

↓

HTMLPreElement
Because it inherits from HTMLElement, it supports:
- Events
- Attributes
- Styles
- Classes
- Dataset values
- Text manipulation
Reading Text from <pre>
Example:
1
2
3
4
5
6
7
8
9
<pre id="code">

function hello(){

console.log("Hi");

}

</pre>
JavaScript:
1
2
3
4
const code =
document.getElementById("code");

console.log(code.textContent);
Output:
1
2
3
4
5
function hello(){

console.log("Hi");

}
Notice that:
textContent
preserves:
- Spaces
- Tabs
- Newlines
This makes it ideal for code editors and documentation tools.
Modifying <pre> Content
JavaScript can dynamically update preformatted text.
Example:
1
2
3
4
5
const output =
document.querySelector("pre");

output.textContent =
"New formatted text";
The browser updates the displayed content immediately.
Using <pre> for Dynamic Output
Many web applications use <pre> for displaying generated information.
Examples:
- API responses
- JSON data
- Logs
- Debug messages
- Terminal simulations
Example:
1
<pre id="output"></pre>
JavaScript:
1
2
3
4
5
6
7
8
9
10
document.getElementById("output")
.textContent =
JSON.stringify(
{
name:"HTML",
version:"5"
},
null,
4
);
Output:
1
2
3
4
{
    "name": "HTML",
    "version": "5"
}
5.8.4.2 CSS White-Space Control
The behavior of <pre> is closely connected with the CSS white-space property.
The default behavior is:
1
white-space:pre;
This means:
- Preserve spaces.
- Preserve line breaks.
- Preserve tabs.
- Do not automatically wrap text.
The white-space Property Values
Modern CSS provides several useful modes.
white-space: pre
Example:
1
2
3
4
5
pre{

white-space:pre;

}
Behavior:
1
2
3
Space preserved
Line breaks preserved
No wrapping
This is the default behavior of <pre>.
white-space: pre-wrap
Example:
1
2
3
4
5
pre{

white-space:pre-wrap;

}
This keeps formatting but allows wrapping.
Example:
1
VeryLongLineThatWouldNormallyOverflowTheScreen
The browser can wrap the line while preserving spaces.
This is often the best option for responsive websites.
white-space: pre-line
Example:
1
2
3
4
5
pre{

white-space:pre-line;

}
Behavior:
- Preserves line breaks.
- Collapses multiple spaces.
Example:
Source:
1
Hello      World
Displayed:
1
Hello World
white-space: break-spaces
A newer CSS value:
1
2
3
4
5
pre{

white-space:break-spaces;

}
It preserves:
- Spaces.
- Tabs.
- Line breaks.
It also allows wrapping after spaces.
Useful for:
- Text editors.
- Online coding tools.
- Advanced documentation systems.
Comparison Table
| Value | Spaces | Line Breaks | Wrapping |
|---|---|---|---|
| pre | Preserve | Preserve | No |
| pre-wrap | Preserve | Preserve | Yes |
| pre-line | Collapse | Preserve | Yes |
| break-spaces | Preserve | Preserve | Yes |
Choosing the Right Mode
For programming examples:
1
white-space:pre;
For responsive code blocks:
1
white-space:pre-wrap;
For user-generated text:
1
white-space:pre-line;
5.8.4.3 Accessibility Considerations
The <pre> element has strong accessibility support.
Screen readers generally identify it as preformatted content.
However, developers should remember:
A large block of code can be difficult to navigate.
Good practices include:
- Add descriptive headings.
- Explain the code before displaying it.
- Avoid unnecessary huge code blocks.
- Provide alternative explanations.
Example:
Good:
1
2
3
4
5
6
7
8
9
10
11
12
13
<h2>Example JavaScript Function</h2>

<p>
This function calculates the total price.
</p>

<pre><code>
function total(){

return price * quantity;

}
</code></pre>
The user understands the purpose before hearing the code.
5.8.4.4 SEO Considerations
The <pre> element itself does not provide ranking benefits.
Search engines understand the content, but excessive code blocks may affect readability.
Good SEO practices:
- Provide explanations around examples.
- Use headings.
- Add meaningful descriptions.
- Avoid pages containing only code.
For technical blogs, the ideal structure is:
1
2
3
4
5
6
7
8
9
10
11
12
13
Explanation

↓

Code Example

↓

Explanation

↓

Practical Result
5.8.4.5 Browser Compatibility
The <pre> element is supported by every major browser.
| Browser | Support |
|---|---|
| Chrome | ✅ |
| Firefox | ✅ |
| Edge | ✅ |
| Safari | ✅ |
| Opera | ✅ |
| Mobile Browsers | ✅ |
Because <pre> has existed since early HTML versions, compatibility issues are extremely rare.
5.8.4.6 Performance Considerations
The <pre> element itself is lightweight.
However, developers should consider the size of its content.
A small code example:
1
100 lines
has no practical impact.
A massive log:
1
Millions of lines
may cause:
- Slow rendering.
- High memory usage.
- Browser freezing.
For extremely large output, consider:
- Pagination.
- Virtual scrolling.
- Lazy loading.
- Server-side processing.
Professional Best Practices
Use <pre> for formatted text
Good:
1
2
3
4
5
<pre>
server {
    listen 80;
}
</pre>
Use <pre><code> for programming examples
Recommended:
1
2
3
4
5
<pre><code>

console.log("Hello");

</code></pre>
Always escape special characters
For HTML examples:
1
<div>Hello</div>
Make code blocks responsive
Recommended CSS:
1
2
3
4
5
6
7
pre{

overflow-x:auto;

max-width:100%;

}
Avoid unnecessary <pre> usage
Do not use <pre> simply to create spacing.
Bad:
1
2
3
4
5
6
7
<pre>


Large gap


</pre>
Use CSS margins instead.
Interview Questions
Question 1
What does <pre> represent?
Answer:
Preformatted text where whitespace is preserved.
Question 2
Why is <pre> commonly combined with <code>?
Answer:
<pre> preserves formatting, while <code> provides semantic meaning.
Question 3
Which CSS property controls <pre> whitespace behavior?
Answer:
white-space.
Question 4
Does <pre> escape HTML automatically?
Answer:
No.
HTML entities must be escaped manually.
Question 5
Can JavaScript modify <pre> content?
Answer:
Yes, using DOM methods such as textContent.
Did You Know?
Modern online code editors and documentation systems often use
<pre>as the foundation of their display layer. Even advanced tools with syntax highlighting, line numbers, and copy buttons usually begin with a simple<pre><code>structure before adding JavaScript enhancements.
Summary
In this section, you learned:
- DOM manipulation of
<pre>. - The
HTMLPreElementinterface. - Reading and updating preformatted content.
- CSS whitespace modes.
- Responsive code display.
- Accessibility principles.
- SEO considerations.
- Browser compatibility.
- Performance concerns.
- Professional implementation practices.
Coming Up Next — Section 5.8.5
In the final section of the <pre> element chapter, we will explore:
- Advanced code block design.
- Syntax highlighting architecture.
<pre>in Markdown and static site generators.- Jekyll implementation examples.
- Security considerations.
- XSS prevention.
- Complete technical reference table.
- Final
<pre>chapter summary.
After completing Section 5.8.5, the <pre> element chapter will be complete, and we will continue Chapter 5 with the next HTML element in the reference series.
5.8.5 Advanced Code Block Design, Syntax Highlighting Architecture, Markdown Integration, Jekyll Implementation, Security, and Complete Technical Reference
Welcome to the final section of the <pre> element chapter.
Throughout this chapter, we explored <pre> from beginner concepts to browser internals:
- What preformatted text means.
- How whitespace preservation works.
- How browsers parse
<pre>. - Why
<pre><code>is the standard for programming examples. - CSS control of whitespace.
- JavaScript manipulation.
- Accessibility and SEO considerations.
Now we will complete our study by examining how <pre> is used in real-world publishing systems, documentation platforms, and modern static websites.
5.8.5.1 Advanced Code Block Architecture
Modern code blocks are much more than plain text.
A professional code block usually contains:
1
2
3
4
5
6
7
8
9
10
11
12
13
14
15
Code Container

│

├── Language Identification

├── Syntax Highlighting

├── Line Numbers

├── Copy Button

├── Expand/Collapse Option

└── Responsive Scrolling
At the foundation of this structure is usually:
1
2
3
<pre><code>
Your code here
</code></pre>
Additional features are added using CSS and JavaScript.
Basic Professional Code Block Structure
Example:
1
2
3
4
5
6
7
8
9
10
11
12
13
14
15
<div class="code-container">
<button class="copy-button">
Copy
</button>
<pre>
<code class="language-html">
<h1>Hello World</h1>
</code>
</pre>
</div>
Here:
<div>controls the overall component.<button>provides interaction.<pre>preserves formatting.<code>identifies programming content.
5.8.5.2 Syntax Highlighting Architecture
Browsers do not automatically understand programming languages.
For example:
1
2
3
4
5
function hello(){

console.log("Hello");

}
The browser sees only text.
It does not know:
functionis a keyword."Hello"is a string.consoleis an object.
Syntax highlighting tools analyze the code and add additional markup.
Before Highlighting
Original:
1
2
3
4
5
6
7
8
9
<pre><code>

function hello(){

console.log("Hello");

}

</code></pre>
After Highlighting
A highlighting library may transform it into:
1
2
3
4
5
6
7
8
9
10
11
12
13
14
15
16
17
18
19
20
21
22
<pre>
<code>

<span class="keyword">
function
</span>

hello(){

<span class="object">
console
</span>
.log(
<span class="string">
"Hello"
</span>
);

}

</code>
</pre>
CSS then applies visual styling.
Popular Syntax Highlighting Tools
Common libraries include:
- Prism.js
- Highlight.js
- Shiki
These tools support languages such as:
- HTML
- CSS
- JavaScript
- Python
- Java
- C++
- SQL
- Bash
- JSON
- Markdown
5.8.5.3 <pre> in Markdown
Markdown automatically converts fenced code blocks into HTML.
Example Markdown:
1
2
3
```html
<h1>Hello World</h1>
```
The generated HTML is usually:
1
2
3
4
5
<pre><code class="language-html">
<h1>Hello World</h1>
</code></pre>
This is why almost every Markdown-based documentation system relies on <pre>.
5.8.5.4 <pre> in Jekyll Websites
Since you are building content with Jekyll, understanding this connection is important.
Jekyll converts Markdown code blocks into HTML automatically.
Example:
Markdown:
1
2
3
4
5
6
7
```javascript
function greet(){

console.log("Hello");

}
```
Generated HTML:
1
2
3
4
5
6
7
8
9
10
11
12
13
14
15
16
17
18
19
20
21
<div class="language-javascript highlighter-rouge">

<div class="highlight">

<pre class="highlight">

<code>

function greet(){

console.log("Hello");

}

</code>

</pre>

</div>

</div>
Jekyll themes then apply CSS styling.
Custom Jekyll Code Block Styling
You can customize code blocks using CSS.
Example:
1
2
3
4
5
6
7
8
9
10
11
.highlight pre{

padding:20px;

border-radius:12px;

overflow-x:auto;

font-size:0.95rem;

}
This improves:
- Mobile readability.
- Visual appearance.
- User experience.
5.8.5.5 Copy Button Implementation
Modern documentation websites often provide copy buttons.
Example:
HTML:
1
2
3
4
5
6
7
8
9
10
11
<button onclick="copyCode()">

Copy

</button>

<pre id="code">

npm install jekyll

</pre>
JavaScript:
1
2
3
4
5
6
7
8
9
function copyCode(){

const text =
document.getElementById("code")
.textContent;

navigator.clipboard.writeText(text);

}
The user can copy the exact content without manually selecting text.
5.8.5.6 Security Considerations
Displaying user-generated code requires caution.
The biggest risk is:
Cross-Site Scripting (XSS)
Unsafe example:
1
2
element.innerHTML =
userInput;
If the user enters:
1
<script>alert("Attack")</script>
the browser may execute it.
Safe Method
Use:
1
2
element.textContent =
userInput;
instead.
textContent displays the content as text rather than interpreting it as HTML.
Escaping Code Examples
When displaying HTML:
Unsafe:
1
<h1>Hello</h1>
Safe:
1
<h1>Hello</h1>
Always escape:
<>&- Quotes when necessary
5.8.5.7 Search Engine Optimization
A technical article containing code should not contain only code.
Search engines prefer useful explanations.
Recommended structure:
1
2
3
4
5
6
7
8
9
10
11
12
13
14
15
16
17
18
19
20
21
Introduction

↓

Explanation

↓

Code Example

↓

Output

↓

Practical Usage

↓

Conclusion
A page full of only <pre> content may provide limited value.
5.8.5.8 Accessibility Best Practices
Professional code examples should include:
Descriptive headings
Example:
1
2
3
<h3>
HTML Form Example
</h3>
Explain the purpose
Before:
1
2
3
4
<pre><code>
<form>
</form>
</code></pre>
Add:
1
2
3
<p>
This example creates a basic HTML form.
</p>
Avoid extremely wide code blocks
Use:
1
2
3
4
5
pre{

overflow-x:auto;

}
so mobile users are not forced to zoom.
5.8.5.9 Common Professional Mistakes
Mistake 1
Using <pre> for page layout.
Incorrect:
1
2
3
4
5
<pre>

          Centered Text

</pre>
Modern layouts should use CSS.
Mistake 2
Displaying code without escaping.
Incorrect:
1
2
3
<pre>
<div>
</pre>
Correct:
1
2
3
<pre>
<div>
</pre>
Mistake 3
Creating huge unoptimized code blocks.
Large files should use:
- Downloads
- External files
- Collapsible sections
Complete <pre> Technical Reference
| Feature | Description |
|---|---|
| Element | <pre> |
| Meaning | Preformatted Text |
| Category | Flow Content |
| Content Model | Flow Content |
| Void Element | No |
| Closing Tag | Required |
| Default Display | Block |
| Default Font | Monospace |
| Whitespace | Preserved |
| DOM Interface | HTMLPreElement |
| CSS Control | white-space |
| Common Pairing | <pre><code> |
| JavaScript Support | Full |
| Accessibility | Supported |
| SEO Effect | Neutral |
| Browser Support | Universal |
Chapter 5.8 Final Summary — <pre> Element
You have completed a complete study of the HTML <pre> element.
You learned:
Fundamentals
- Meaning of preformatted text.
- Why
<pre>exists. - Basic syntax.
Browser Behavior
- Parsing.
- DOM representation.
- Whitespace preservation.
- Rendering rules.
Development Usage
- Code examples.
- Terminal commands.
- JSON.
- Configuration files.
- Documentation systems.
Advanced Topics
<pre><code>relationship.- Syntax highlighting.
- Jekyll Markdown conversion.
- Copy buttons.
- Responsive design.
- Security.
- Accessibility.
- SEO.
Chapter 5 Progress Update
Completed elements:
✅ <br> ✅ <hr> ✅ <wbr> ✅ <pre>
Each element has been studied from:
- HTML specification
- Browser processing
- DOM behavior
- CSS interaction
- JavaScript usage
- Accessibility
- SEO
- Professional implementation
Coming Up Next — Chapter 5.9
The next element in our HTML Reference journey will be:
The <blockquote> Element
We will explore:
- Quoting external sources.
- Semantic meaning of quotations.
- Difference between
<blockquote>and<q>. - Citation attributes.
- Browser rendering.
- Accessibility.
- SEO.
- Styling quotations.
- Real-world publishing examples.
- Professional best practices.
The <blockquote> element is especially important for blogs, journalism, research articles, reviews, and educational content.
End of Section 5.8 — The <pre> Element
Status: ✅ Complete
The <pre> element is now fully documented as part of:
The Complete HTML Reference: A–Z Guide for Modern Web Development